Do you have a tall skinny minny? Or a little one who needs a bigger width then their height? This is a simple easy route to mashing sizes for children to get a better fit! No more just adding to the hem!! If your child needs length they need it throughout the whole garment, not just the hem! And vice versa if your child is shorter they need it shortened throughout the whole garment.
So here is the quick guide. You will take their overall height and match that to the size chart of your pattern… for this example I’m going to be using my niece who is 44″ tall- which matches my size 5. Her chest and waist match a size 4. So I will be using the width of a 4 and the length of the 5 on every pattern piece!
**I’m going to note in here too that going more then 2 sizes is very hard to keep the proportion and shape of the pattern.
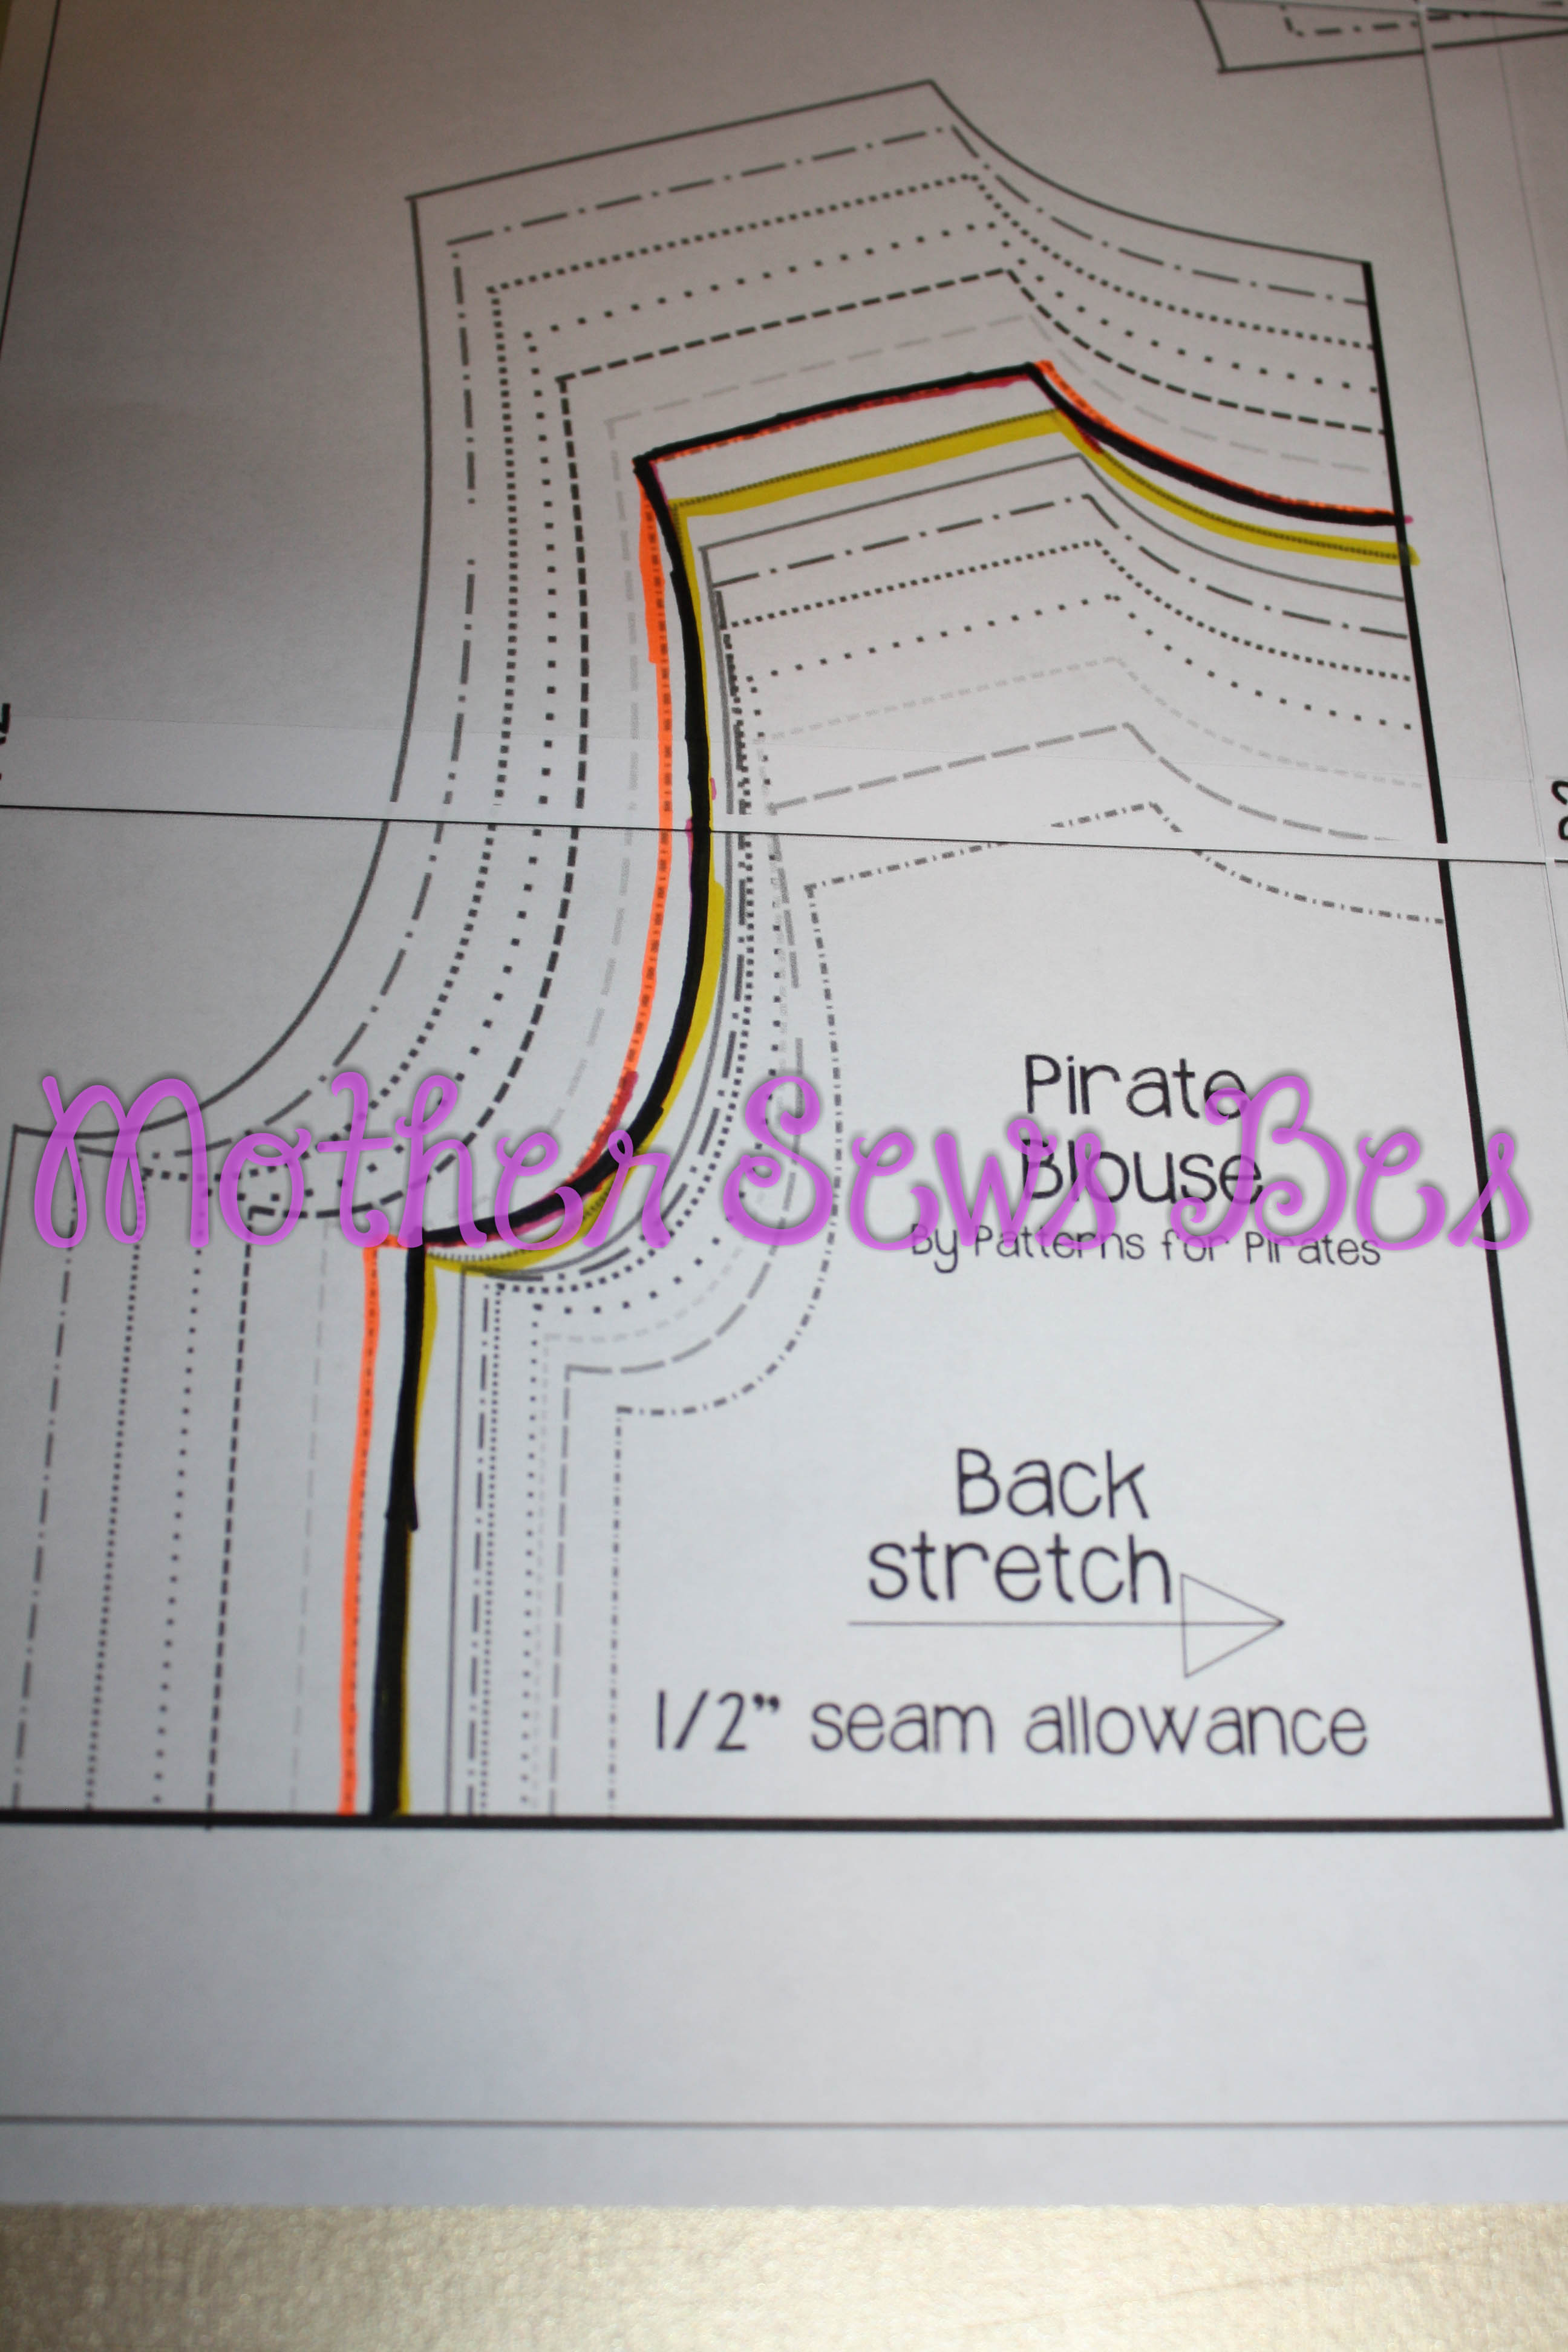
Here is a picture where I highlighted the size 4 and 5 (Size 4 in yellow and size 5 in orange). I don’t typically do this, but I did to help illustrate 🙂

And here I drew in black to show how I followed the size 4 width overall on the piece and the size 5 length. See how I made the armhole the size 5 length, and neck hole… these are places where your little ones fit will drastically improve with this method!
And again, here is the sleeve with a 4 width and 5 length. Make sure you keep EVERY piece the same length/width and your pattern will fit together beautifully 🙂

Coming from a very tall girl- if your little one needs added length they will be so much more comfortable with that longer armhole/neckhole/bodice!! I can hardly wear shirts that I don’t add that 1/8-1/4″ at my armhole… even though it seems like such a small adjustment it makes such a BIG difference in my fit! 🙂
This method can also be used with a shorter length to width— I used to do this for my little one when he was younger– he is big for age so he was in toddler sizing with a baby figure! He needed a much bigger around then his height and it worked wonderful for him!
Now go create that perfect custom fit!! 🙂

thank you i will try this!
Pingback: Petite and Tall Pattern Adjustment Tips | Mother Sews Best Blog
Pingback: How to do Petite and Tall Fitting Adjustments